Hop PushEE
Current Version: 3.0.3- EE2
- EE3
- EE4
- EE5
- EE6
-
Demo
For a working demo of this add-on, visit https://push.hopstudios.com/.
-
You Will Also Need
- You will need to setup a OneSignal Web Push account to use with Hop PushEE. Don’t worry – it’s free!
-
Installation EE 2
- Unzip the folder to a temporary location on your local hard drive.
- FTP the files from their local folders to the same locations in your EE install’s /system/expressionengine/third_party/ and /themes/third_party/ folders on the server.
- Navigate to Modules in your EE control panel and install the add-on. That’s it!
-
Installation EE 3+
- Unzip the folder to a temporary location on your local hard drive.
- FTP the files from their local folders to the same locations in your EE install’s /system/user/addons/ and /themes/user/ folders on the server.
- Navigate to Add-ons in your EE control panel and install the add-on. That’s it!
-
Usage
- In the OneSignal dashboard, define your audience segments. For example:
Subscribed: Business News
Subscribed: Entertainment News
Note: OneSignal has a built-in segment called All that contains all your subscribers. It can be used to send notifications to all your subscribers. - In EE, create your matching categories. You must set up a category for each audience segment you defined in OneSignal.
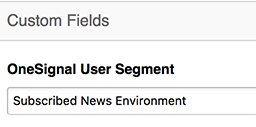
- Set up a custom category field whose value exactly matches the name of the matching audience segment in OneSignal.

- Set up your EE channel(s). You can either set up an EE channel specifically for your notification entries or you can integrate Hop PushEE functionality into existing channels.
- PushEE sets the URL for the notification to match the Comment URL in the channel settings. You can also override this directly in an EE template set for sending push notifications.
- In your channel, create a Hop PushEE field that will trigger notifications. You can select Send or Send Again to prompt the sending of notifications.
- Create a template for Hop PushEE to use when sending a notification. Select it in the Hop PushEE settings.
Here’s a simple example of the Hop PushEE tags used in the template. The icon, title and url will use defaults, but can also be set using specific tags. Any text output by the template will appear as the body of the notification. If the template outputs nothing, the notification won’t be sent.
Note: you don’t need to use any{exp:hop_pushee:set_icon}https://site.com/images/icon.png{/exp:hop_pushee:set_icon} {exp:hop_pushee:set_title}Notification - from Hop Studios{/exp:hop_pushee:set_title} {exp:hop_pushee:set_url}{url_title_path="news/item"}{/exp:hop_pushee:set_url} {if summary == ''}Click here to read the article{if:else}{summary}{/if}{exp:channel:entries}tag in the template to display the Hop PushEE field content. Hop PushEE uses the details of the entry you are currently saving.
- In the OneSignal dashboard, define your audience segments. For example:
-
Add-On Setup
- Go to Modules > Hop PushEE > Settings.
- Enter your OneSignal app id and API key.
- Select which category custom field matches to your OneSignal segments.
- Select which entry status(es) trigger the notification.
- Enter a default icon URL. This must be an absolute URL, using http:// or https://
- Select the template that displays the notification content.
-
Interface
You need to create the interface for how visitors subscribe to notifications – it can be easily setup with our load_js and button functions. For more information, please visit OneSignal Web Push SDK documentation.
{exp:hop_pushee:load_js}
This will load the basic OneSignal js. We recommend using the parameter
include_ui_js="yes"to get the full UI scripts we use in our example website.If you are using the full set of js with
{exp:hop_pushee:load_js include_ui_js="yes"}, you can use the following functions to create the interactive buttons.{exp:hop_pushee:button_enable}
This is to authorize the browser to be able to send notifications.
Parameters
button_text (Optional) The text to show before the browser is authorized. Default:
<strong>Authorize <em>{site_name}</em> notifications</strong>authorized_text (Optional) The text to show after the browser is authorized. Default: You have authorized notification
attr:{attributes} (Optional) You can define id, class, or any other attributes that you want to attach to the button.
For example:attr:class="btn btn-default"{exp:hop_pushee:button_subscribe}
This will create the subscribe button to add user to the specified segment by attaching the user tag name and value that you set earlier in the OneSignal dashboard.
Parameters
user_tag_name The user tag name in OneSignal.
user_tag_value The user tag value needed for the segment.
subscribe_text (Optional) The text to show before the user is subscribed to this segment.
Default: Subscribeunsubscribe_text (Optional) The text to show if the user is subscribed to this segment.
Default: Unsubscribeattr:{attributes} (Optional) You can define id, class, or any other attributes that you want to attach to the button. For example:
attr:class="btn btn-default"{exp:hop_pushee:button_subscribe_all}
This will make the user subscribe to all the segments presented on the page.
Parameters
button_text (Optional) Default: Subscribe to All
attr:{attributes} (Optional) You can define id, class, or any other attributes that you want to attach to the button. For example:
attr:class="btn btn-default"{exp:hop_pushee:button_unsubscribe_all}
This will make the user unsubscribe from all the segments presented on the page.
Parameters
button_text (Optional) Default: Subscribe to All
attr:{attributes} (Optional) You can define id, class, or any other attributes that you want to attach to the button. For example:
attr:class="btn btn-default" -
Send a Notification
tl;dr: Notifications are triggered when all conditions set in the Add-On settings are met. The conditions to be met are:
- Custom field is set to Send.
- The entry status matches the triggering status(es).
- The entry is saved/published.
- Create a new entry in your channel.
- Set the Hop PushEE field that determines the notification status to Send. After the notification is sent, you can re-send it by selecting Send Again.
- Select the category or categories for any audience segments you want to receive the notification.
- Select an entry status that enables notification.
- Publish your entry. When all conditions are met, the notification will be sent instantly.

Note: You may send multiple notifications from the same entry, as long as you reset the field and status appropriately.
Note: Your notification will be sent at the moment the entry is published. You cannot future-date your entry and have the notification send at that time; the notification will be sent immediately.
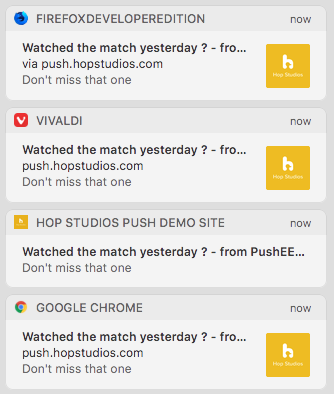
Note: Browser notifications will not display HTML or images, only text. You can, however, vary the icon.
-
Updating
Updating is easy:
- Download a new version from this website, and extract on your hard drive.
- Upload the new files to their appropriate locations.
-
Uninstalling
- Navigate to the Add-Ons > Modules tab in your EE control panel and uninstall the module.
- Remove the add-on directory from your EE system folder on the server.
-
Version History
Last updated: 2 years ago
3.0.3 - 2021-07-14
Fixed
- Installer reference
3.0.2 - 2021-06-10
Updated
- README and add-on description
Removed
- Unnecessary icon CSS invert code
3.0.1 - 2021-02-26
Updated
- Packages updated
- Trigger field matching logic
Removed
- Custom field trigger setting
3.0.0 - 2021-01-25
Updated
- Hello EE6!
Added
- Default js added for usage
- Button builders
- Trigger fieldtype
- Hop License
2.0.1 - 2019-06-18
Updated
- Removing channel short name restriction
2.0.0 - 2019-03-27
Updated
- Name change to Hop PushEE
1.0.5 - 2018-04-05
Added
- UI improvements
1.0.4 - 2018-03-05
Updated
- Several bug fixes for EE3 and EE4
1.0.3 - 2018-02-05
Added
- EE2 version added
Updated
- Small bug fixes
1.0.2 - 2018-01-29
Updated
- UI improvement
- Small bug fixes
1.0.1 - 2018-01-26
Updated
- Change hook to trigger notifications on entry creation or entry edit
1.0.0 - 2017-12-19
Added
- Initial Release