Protect your online assets. In an era where digital security is more critical than ever, websites, as the digital face of many businesses and personal endeavours, are frequent targets for would-be spam senders, bots, hackers, and other malicious actors.
One of the most effective ways to enhance your website’s security is through Two-Factor, Two-Step or Multifactor Authentication (2FA, 2SA, or MFA). In this blog post, we’ll explore what 2FA is, why it is essential, and how you can set it up in each of the three Content Management Systems (CMS) Hop Studios specializes in: WordPress, Craft CMS, and ExpressionEngine.
What is Two-Factor Authentication?
Think of 2FA as a belt AND suspenders for accessing your online accounts. It combines something you know — like a password — with something you have — usually your phone — or are — like a fingerprint or face scan — to create a dual-layered defence system. 2FA’s effectiveness lies in making your credentials more personal and specific, and ultimately more difficult for others to use. 2FA goes a long way to ensure that the person logging in is actually you.
Here’s a simple way to understand how 2FA operates:
- The Standard Recall (Your Password): First, you’ll enter your password. This is something you know—like where you hid something.
- The Magic Key (Your Unique Factor): Next, you provide a unique factor – it could be a code sent to your phone or generated by an app like Google Authenticator. Many password managers can store 2FA codes as well. This is like having the key to the treasure chest.
With the additional security measure, you ensure that only you can access your accounts—even if your password has been compromised. The “magic” of 2FA is that there’s two roadblocks to gaining access, and both are specific to you.
2FA is especially effective at blocking automated attacks from bots, the most common form of online attack. The benefits of using 2FA are obvious — if your login credentials leak, they still can’t be used. Your website is better protected from data breaches, and therefore so are your users. In fact, offering the option of 2FA to your users is a clear sign of your trustworthiness and credibility, so look for it on any website you create an account on, and consider adding it to any website you maintain that lets the public make accounts.
The downside to 2FA largely boils down to: it’s more annoying! Using 2FA means it will take you slightly longer to log into a website than it did with just a password, and if you’ve lost your phone, you may have some difficulty regaining access to your account. Setting up an account on a new website or service may also require more time, especially if 2FA is required and not optional. But these speed bumps are tiny compared to the increase in security that enabling 2FA provides.
Setting Up 2FA in WordPress
Adding 2FA to your account on a WordPress site typically requires using a third-party plugin. However, if you’re hosted on WPEngine you can implement 2FA from the WPEngine User Portal just within the settings. If you’re not hosted with WPEngine, you’ll need to use a plugin to enable 2FA.
There are a plethora of WordPress 2FA plugins that may be right for your site—there’s not one that stands uniquely apart and handles all circumstances. We encourage you to do your research carefully and find a plugin that best fits you and your users’ 2FA needs—or contact us and we’ll help.
Setting Up 2FA in Craft CMS
To use 2FA with Craft CMS before version 5, you must install the Two-Factor Authentication plugin to make it available to users. The plugin uses authenticator apps for verification rather than phone numbers. The plugin must be installed and configured, but this is a one-time task.
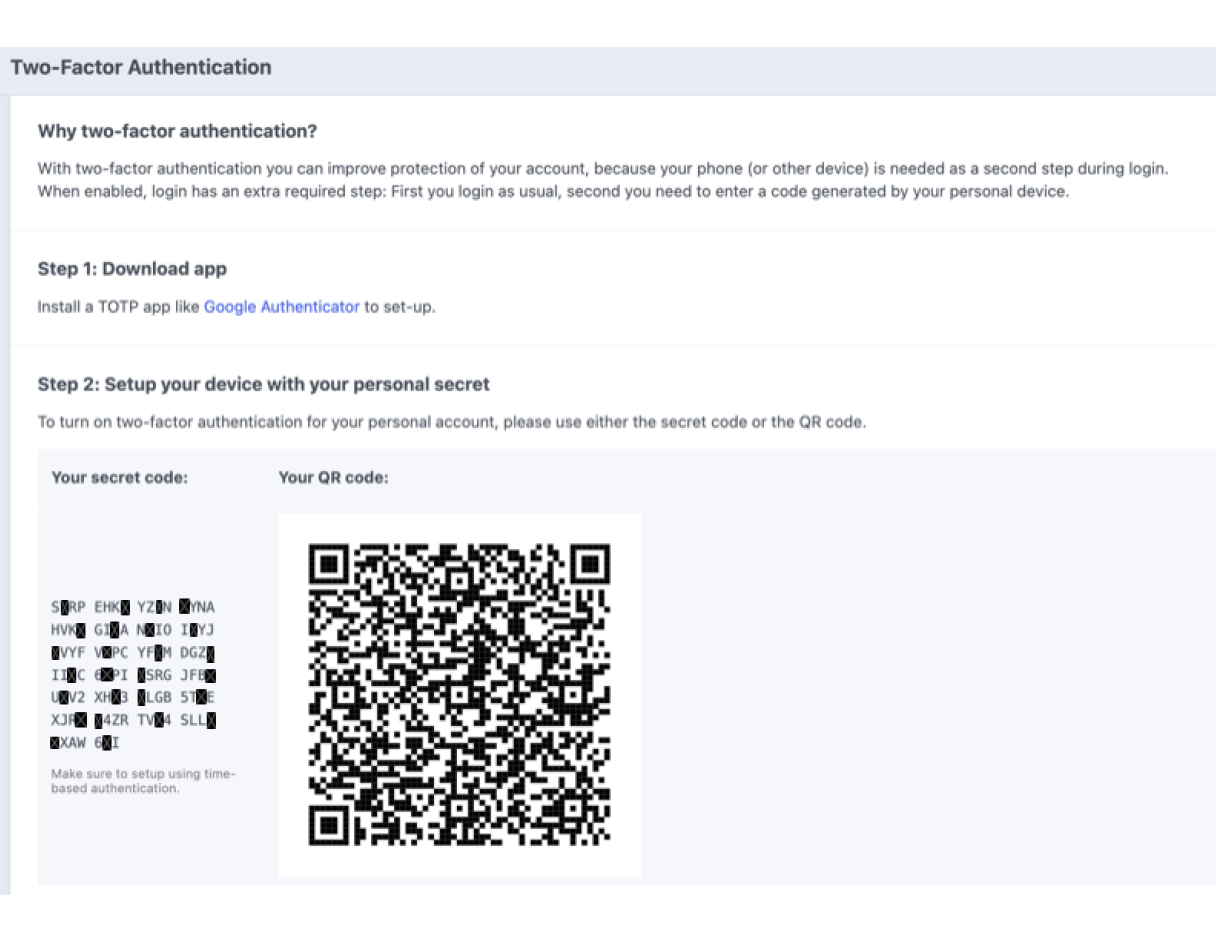
After installing the plugin, a link to Two-Factor Authentication is added to the left-hand navigation bar. Users can click this link or go to their profile to configure 2FA.
- Click the Two-Factor Authentication link in the left-hand navigation bar or go to the MFA screen in your profile. This opens the Two-Factor Authentication screen.
- Use the QR code to set up your login in an authenticator app like Google Authenticator. Typically, you simply point your phone at the QR code and the app does the rest.
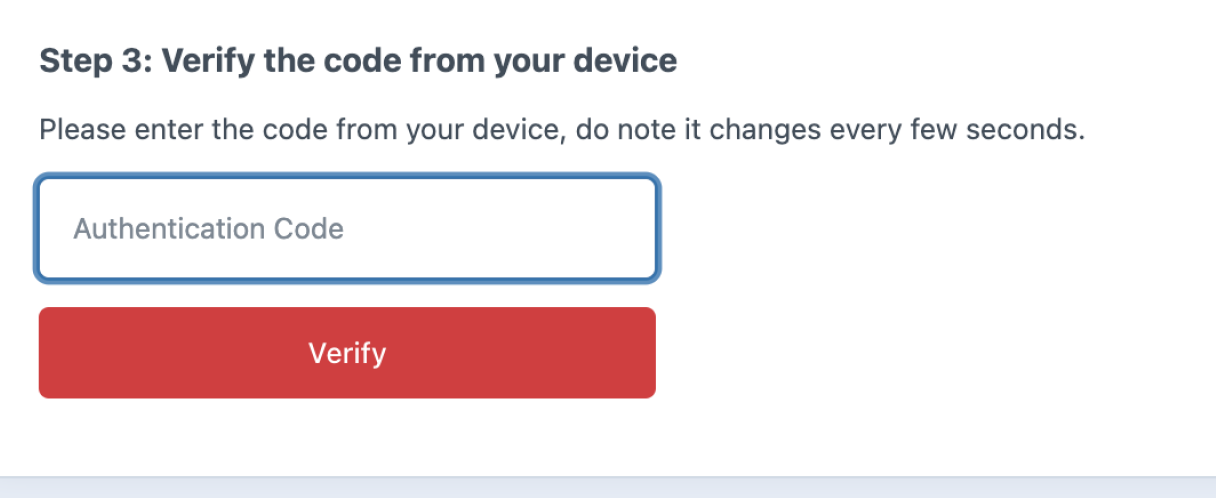
- Once your authenticator app is configured, type the authentication code into Craft and click Verify. This will confirm that your setup is accurate.
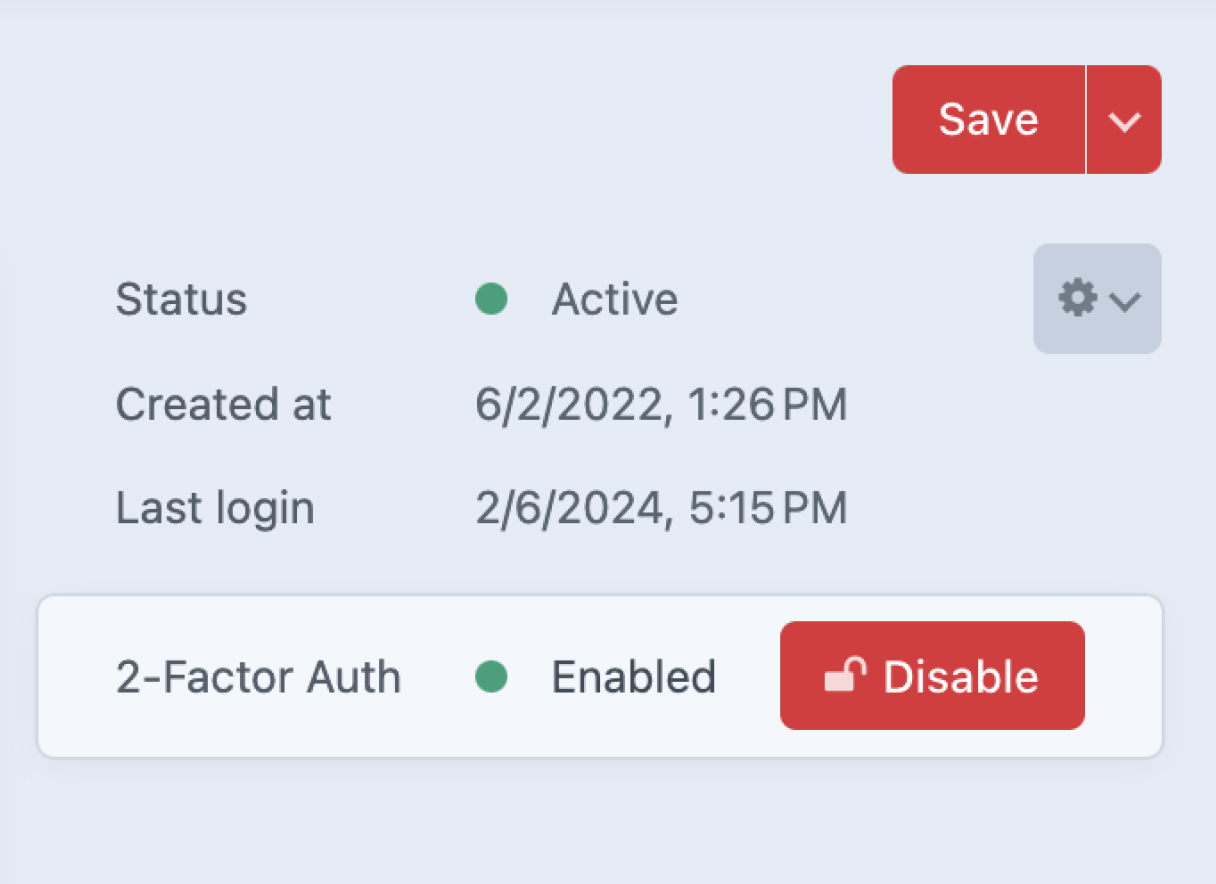
- Once 2FA is configured for your account, it will show as enabled.
- The next time you log into Craft, open the authenticator app and type the authentication code into the prompt to complete your login.
Return to your profile if you want to turn 2FA off.
Craft CMS v5 has built-in multi-factor authentication for users with control panel access. You can choose to add a TOTP (one-time password, also called 2FA by Craft CMS) or a Passkey, or both—the documentation is a little short about how this works. Here’s how:
* Any user with control panel access can add one or both to secure their account. This option can’t easily be disabled.
* You can make 2FA (authentication) a requirement for everyone in any user group, but not for specific members. The authentication is via app, not phone number / SMS.
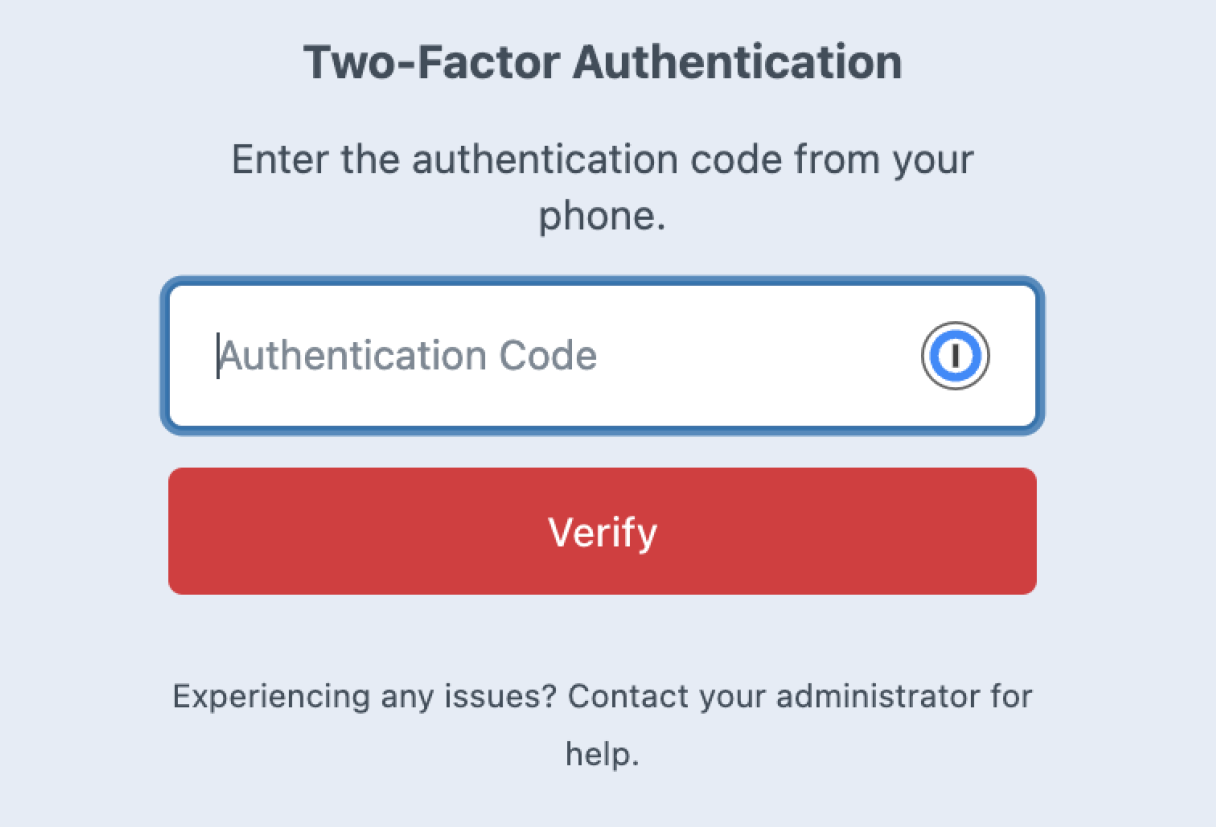
* You cannot make passkeys a requirement.
Setting Up MFA in ExpressionEngine 7
In EE7, multi-factor authentication is incorporated into the CMS, and can be turned on and off for all users or just for those in a particular member role. EE’s MFA uses authenticator apps rather than phone numbers for verification—this is because as a site administrator, you can set up MFA with an authenticator without needing any third-party software (or subscription)!
First, MFA must be turned on for the site. This task only needs to be done once, and must be completed by a super admin:
- In the dashboard, go to Settings > Member Settings.
- Turn the Enable Multi-Factor Authentication toggle on.
Once this is enabled, each user can then separately set up MFA for themselves:
- In the dashboard, click on your profile image at the top right and select My Profile.
- Select Multi-Factor Authentication in the Account menu, and set the Enable Multi-Factor Authentication toggle to on. This will display a QR code for use in configuring your second factor.
- Scan the QR code with your authenticator app or password manager, and note your Backup Code in a secure place.
- Fill in the Verification Code provided by your authenticator app or password manager and click Save.
Requiring MFA for Role(s)
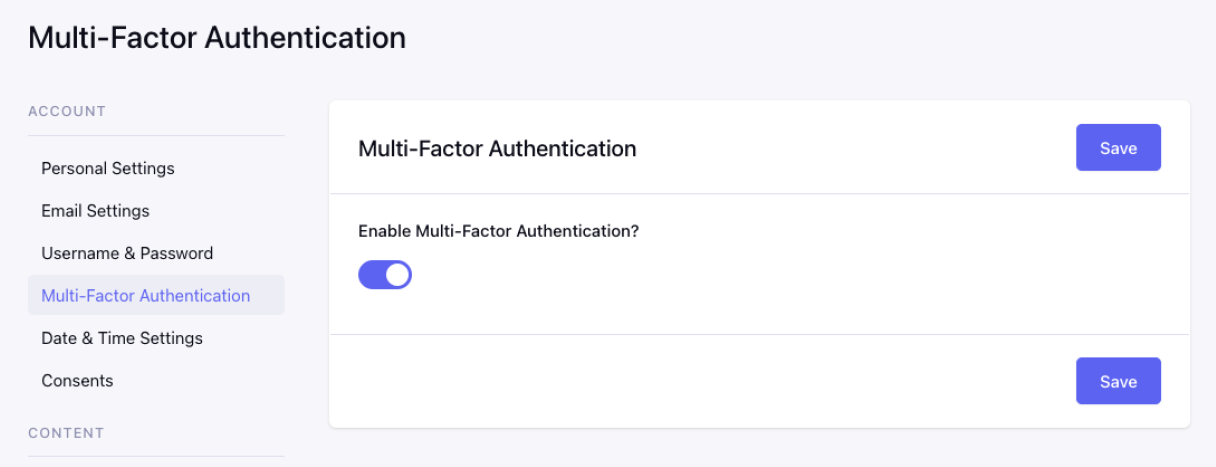
In EE, you can require Require Multi-Factor Authentication per Member Role—so that members who are assigned this role are required to set up MFA when they next log in.
Note that if these users do not have control panel access, this process of enabling MFA involves the display of a system message-type page that might be a little jarring if you’ve never customized the template Full documentation for ExpressionEngine MFA is available.
Conclusion
Implementing 2FA may seem like a big step, but it’s not that difficult and it is a significant improvement for online security: adding this extra security layer protects the digital assets and identity of every site user, and of your site overall. By setting up 2FA, you not only secure your website but also contribute to a safer and more trustworthy digital environment.
Remember, though: While 2FA does enhance security, it’s just one part of a comprehensive security strategy. Regular updates, secure and unique passwords, and vigilant monitoring are equally crucial in safeguarding your online presence!
